
How to Degrease Kitchen Cabinets for Painting
To degrease kitchen cabinets for painting, wipe away loose dirt, wash the surfaces with a suitable grease cutting cleaner, rinse when the product requires it and let everything dry completely before sanding or priming. The right cleaner depends on the cabinet material, existing finish and amount of grease present. Removing cooking oils and cleaner residue helps the new coating adhere properly.
TL;DR
- Clean before sanding. Sanding greasy cabinets can spread contaminants across the surface and interfere with primer adhesion.
- Choose the right cleaner. Dish soap and warm water may handle light grease, while a compatible kitchen degreaser is often more effective on heavier buildup.
- Work gently. Avoid soaking wood, lifting veneer or damaging existing paint with an overly aggressive cleaner.
- Rinse when required. Leftover detergent or degreaser can interfere with the next coating.
- Dry completely before continuing. Clean cabinets must be dry, free of residue and properly prepared before primer or paint is applied.
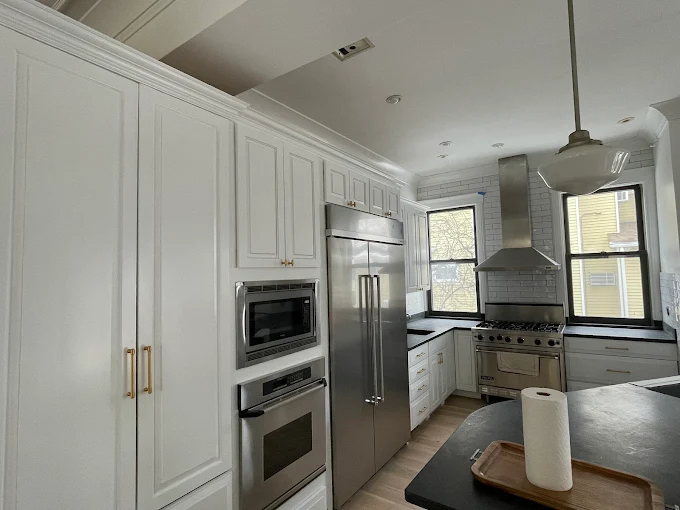
Why You Must Degrease Kitchen Cabinets Before Painting
Kitchen cabinets accumulate cooking oil, airborne grease, food splashes, fingerprints, dust and residue from household cleaners. The buildup is often heaviest around cabinet pulls, above the stove, near the range hood and along the edges of doors that people touch frequently.
Grease creates a barrier between the cabinet surface and the new coating. Even if paint initially appears to cover the surface, contamination can contribute to poor adhesion, peeling, uneven coverage or premature wear. Soap, furniture polish and other cleaning products can leave films that cause similar problems if they are not removed properly.
This is why cleaning cabinets before painting must happen before sanding and priming. Sandpaper is intended to prepare the existing finish, not remove thick layers of cooking grease. Sanding a dirty surface can spread oils into other areas and contaminate the abrasive.
Degreasing is only one part of cabinet preparation. You may still need to scuff sand a glossy finish, repair damaged areas, remove loose paint, apply a suitable primer and use a coating intended for cabinetry.
What to Use to Degrease Kitchen Cabinets
There is no single cleaner that works best for every cabinet. Start with the mildest product likely to remove the contamination, then move to a stronger compatible cleaner if necessary.
Dish Soap and Warm Water
A small amount of ordinary dishwashing liquid in warm water is a reasonable starting point for light grease and everyday grime. Dish soap helps loosen oily residue so you can wipe it away with a clean sponge or cloth.
Use a diluted solution rather than applying concentrated soap directly to the cabinet. Work with a damp, not dripping, cloth, and follow with a clean water wipe to remove remaining detergent.
This method may be sufficient for cabinets that receive regular cleaning and have only a thin layer of surface grime. It may not remove years of sticky cooking grease, wax or furniture polish.
Commercial Kitchen Degreasers
A kitchen degreaser or cleaner specifically approved for the surface can be more effective when grease has accumulated around cooking appliances or on frequently handled cabinet doors.
Choose a product whose label permits use on the cabinet material and finish. Some cleaners are intended for washable painted surfaces, while others may be unsuitable for wood finishes, laminate or certain plastics. Stronger does not automatically mean better.
Follow the label’s dilution instructions, application method, contact time, rinsing requirements and safety precautions. Do not assume that a product labeled for kitchen surfaces is automatically suitable for every surface that will be painted.
A cleaner that works on a durable painted cabinet may dull a delicate finish or damage an exposed veneer edge. Test it on a hidden area first.
What to Avoid on Different Cabinet Materials
The material beneath the existing finish matters just as much as the cleaner you choose.
- Solid wood: Avoid excessive water, prolonged wet contact and harsh scrubbing that can damage the finish or raise the grain. Wipe spills promptly.
- Wood veneer: Keep moisture away from seams and exposed edges. Excess water can weaken the adhesive or cause the veneer to lift.
- Laminate and melamine: Use a cleaner approved for the surface. Avoid abrasive pads that can scratch the decorative layer.
- Previously painted cabinets: Check that the cleaner is compatible with the existing coating. Aggressive chemicals or scrubbing can soften, dull or remove paint.
- Glossy factory finishes: Remove grease without damaging the finish, then follow the paint or primer manufacturer’s instructions for scuff sanding or adhesion testing.
Avoid steel wool, abrasive scouring pads and unapproved solvents. Do not use a cleaner simply because it removes grease from a countertop or stovetop; cabinet finishes can react differently.
Never mix cleaning chemicals. In particular, mixing bleach with ammonia or acidic cleaners can release dangerous gases. Use one product at a time, follow its label and rinse between products when appropriate before considering a different cleaner.
Planning a Painting Project?
How to Degrease Kitchen Cabinets for Painting Step by Step
The goal is to remove contamination without saturating the cabinet material or leaving a chemical film behind. Gather clean microfiber cloths or soft sponges, a suitable cleaner, clean water, gloves if recommended by the label and protective coverings for nearby surfaces.
1. Remove Cabinet Doors, Drawers and Hardware
Empty the cabinets you intend to work on. Remove doors, drawer fronts where practical, knobs, pulls and other hardware so you can clean the full surface.
Label each door and its corresponding opening with a simple numbering system. Keep screws and hinges in labeled bags to make reassembly easier.
Removing the hardware exposes grease trapped around screw holes, handles and hinge plates. It also prevents you from spreading grime across the cabinet while working around obstacles.
If removing a particular component could damage it or the surrounding cabinet, leave it in place and clean around it carefully.
2. Protect the Kitchen and Prepare the Cleaning Solution
Cover countertops and floors with suitable protective material. Keep the cleaning area organized, and move food, utensils and small appliances away from the work surface.
Open windows or use suitable ventilation, particularly when working with a commercial degreaser. Read the product label before use, including any instructions for gloves, eye protection, dilution and contact time.
Prepare only the amount of solution you need. If using dish soap, add a small amount to warm water rather than creating a heavily concentrated mixture. If using a commercial cleaner, follow its stated dilution ratio exactly or use it undiluted only if the label specifically directs you to do so. Do not combine different cleaners in the same bucket, spray bottle or cleaning cloth.
3. Clean Doors, Frames, Edges and Greasy Areas
Work on one manageable section at a time so loosened grease does not dry back onto the surface.
- Remove loose dust and crumbs with a dry, soft cloth.
- Apply the cleaning solution to a cloth or sponge, unless the product label directs you to apply it another way.
- Wipe the cabinet surface using gentle, overlapping strokes.
- Pay particular attention to door edges, corners, molding, drawer fronts and areas around handles.
- Use a fresh section of cloth as it becomes dirty, rather than redistributing collected grease.
- Clean the cabinet frames, including the horizontal ledges and narrow recesses where residue accumulates.
Around a range or cooktop, inspect the cabinet doors and undersides of nearby upper cabinets carefully. These areas can collect a thin, sticky film even when the cabinet fronts appear clean.
For detailed profiles and recessed panels, use a soft brush or cloth that reaches the crevices without scratching the finish. Avoid flooding joints or pushing moisture into seams.
If the cloth keeps picking up dark or oily residue, stop and replace it. A dirty cloth can spread contamination to surfaces you have already cleaned.
4. Rinse When Required and Remove Cleaner Residue
After cleaning, check the product label to determine whether rinsing is required. Many detergent based cleaning methods benefit from a clean water wipe and some commercial degreasers explicitly require rinsing.
Use a separate cloth dampened with clean water to remove dissolved grease and leftover cleaner. Wring it out well so it does not leave standing water on the cabinet.
Rinse or change the cloth frequently. Otherwise, you may transfer the removed detergent and grease back onto the surface.
Do not assume that a surface is ready for paint simply because the cleaner has evaporated. Nonvolatile ingredients can remain behind after the water dries. If the label requires rinsing, wiping once with a dry towel is not a substitute.
5. Let the Cabinets Dry Completely
Dry the surfaces with a clean, absorbent cloth, then allow them to air dry with adequate ventilation. Pay extra attention to joints, routed edges, hinge recesses and the ends of doors where moisture can collect.
There is no universal drying time for every cabinet. The required time depends on the amount of water used, the cabinet material, the room’s temperature and humidity and the cleaning product.
Wait longer if the room is humid, the cabinets were heavily soiled or water entered joints or exposed edges. Do not start sanding or priming while the surface still feels damp.
Before moving on, inspect the cabinets under good lighting. They should be dry, free of visible grease and cleaner residue and ready for the remaining preparation steps specified by your primer and paint manufacturers.
Planning a Painting Project?
How to Remove Stubborn Grease From Kitchen Cabinets
Heavy buildup often needs more than one cleaning pass. Repeated, controlled cleaning with a compatible product is generally safer than immediately reaching for the harshest chemical available.
When Cabinets Still Feel Sticky
A sticky surface can indicate remaining grease, but it can also result from detergent residue, furniture polish or an existing finish that has softened or deteriorated.
First, wipe a small area with a clean cloth dampened with water, if water is safe for the finish. If the residue appears to lessen, repeat the appropriate cleaning and rinsing process with fresh clothes.
If the surface remains tacky after cleaning and drying, stop before sanding. Check whether the existing finish is damaged or whether a polish, wax or other coating may be present. A different, finish compatible cleaning method may be needed.
Do not try to solve persistent stickiness by applying more primer. Primer cannot reliably compensate for contamination or a failing underlying finish.
When Grease Has Built Up Around the Range
Grease near cooking appliances may have accumulated over months or years. Clean a small test area first, then use a compatible degreaser according to its label.
Allow the cleaner to work for the specified time without letting it dry on the surface unless the directions say otherwise. Wipe away the loosened grime, rinse when required and repeat with fresh solution and cloth if residue remains.
Use particular care on the underside of upper cabinets and around decorative trim. These areas are easy to overlook and may retain grease even after the visible door fronts have been cleaned.
If the buildup is thick, waxy or resistant to a suitable cleaner, identify the contaminant before using a stronger product. Unnecessary chemical strength can damage the finish without solving the underlying problem.
When the Existing Finish May Be the Problem
Not every tacky or discolored cabinet is simply dirty. Old paint may be softening, clear finishes can deteriorate and some wood finishes may react to cleaning products.
Test an inconspicuous area and observe how the existing coating responds. If it becomes gummy, transfers onto the cloth, blisters or starts lifting, stop cleaning that area and reassess the preparation method.
Where the coating is failing, the solution may involve removing loose or incompatible finish and using a suitable primer system. The correct procedure depends on the material and condition of the cabinets.
If you cannot identify the existing coating or determine why it remains sticky, a professional assessment before sanding or priming can help prevent further damage.
Common Cabinet Degreasing Mistakes to Avoid
- Sanding before cleaning: Grease can spread across the surface and contaminate the sandpaper. Degrease first, dry the cabinet and then sand as needed.
- Using too much water: Excess moisture can swell wood, damage veneer edges and affect joints. Use a damp cloth and dry the surface promptly.
- Applying an overly strong cleaner: Harsh chemicals can dull or soften some finishes. Start with a compatible, milder cleaner and increase strength only when necessary.
- Skipping the rinse: Remaining detergent or degreaser can interfere with the coating system. Follow the product’s rinsing instructions.
- Using one dirty cloth throughout: A saturated cloth spreads oil instead of removing it. Switch to clean cloths or clean sections frequently.
- Ignoring cabinet edges and hardware areas: Grease often remains in recesses, around handles and beneath doors. Inspect these locations separately.
- Painting before the surface is dry: Trapped moisture can interfere with preparation and coating performance. Allow complete drying before continuing.
- Assuming degreasing replaces sanding or priming: Cleaning removes contamination, but it does not automatically create the surface profile or provide the bonding properties required by every paint system.
Planning a Painting Project?
What to Do After Degreasing Kitchen Cabinets
Once the cabinets are clean and dry, continue with the rest of the surface preparation rather than going straight to paint.
Inspect the Surface
Check the doors and frames under good lighting. Look for remaining oily patches, waxy residue, peeling paint, damaged veneer, cracks and areas where the existing coating feels soft or unstable.
If an area still appears contaminated, clean it again using a compatible method. Let it dry and reinspect before sanding.
Sand When Appropriate
Many existing cabinet finishes benefit from light scuff sanding to reduce gloss and provide a better surface for the next coating. Use the grit and method recommended for the existing finish and chosen primer.
Do not sand aggressively through veneer or remove a sound finish unnecessarily. Some bonding primers permit application to certain properly cleaned surfaces without sanding, but that depends on the product, substrate and coating condition. Follow the specific manufacturer’s directions rather than assuming sanding is always optional or always mandatory.
Older painted cabinets may contain lead based paint. If the home or coating may be affected, check applicable lead safe requirements before disturbing the finish. Sanding or scraping lead paint can release hazardous dust.
Remove Sanding Dust
After sanding, remove all dust with a suitable vacuum and clean cloth. If using a damp cloth, avoid leaving moisture behind and allow the surface to dry again.
Dust trapped under primer can create a rough finish and interfere with coating performance. Inspect grooves, corners and door edges where fine particles collect.
Choose the Right Primer and Paint
Select a primer compatible with the cabinet material, existing coating and intended cabinet paint. Bare wood, stained wood, laminate and previously painted cabinets may require different preparation and primer choices.
If the existing finish is glossy or the material is difficult to coat, follow the primer manufacturer’s recommendations for surface preparation and adhesion testing. A small test patch can reveal problems before you commit to the entire kitchen.
After priming, allow the product to dry as directed and perform any recommended sanding or surface correction. Then apply a cabinet-rated paint according to its instructions, including recoat times and curing requirements.
Big League Painting recommends treating cleaning, sanding, priming and painting as separate steps rather than trying to make one product do every job. Each step addresses a different potential cause of coating failure.
For homeowners preparing cabinets in Glenview and Chicago’s North Shore, the same basic principle applies: the condition of the existing finish and the cabinet material should determine the preparation method, not a one size fits all cleaning recipe.
Conclusion
Successful cabinet painting starts with removing the grease that can prevent the new coating from adhering properly. Choose a cleaner suited to the cabinet material, work methodically across doors and frames, rinse when required and allow the surfaces to dry completely before sanding.
Then inspect the existing finish, remove sanding dust and follow the preparation and primer instructions for your chosen paint system. If the cabinets remain sticky, the finish is failing or the material is easily damaged, resolve that issue before proceeding.
Big League Painting can help homeowners who prefer professional guidance with cabinet preparation and painting in the Glenview and Chicago’s North Shore area. If you plan to tackle the work yourself, careful cleaning and surface inspection are the best places to start.