
Can You Paint Cedar? Best Way to Get a Lasting Finish
Yes, you can paint cedar and painted cedar can perform well when the wood is properly prepared and the coating system is appropriate for the surface. The main challenges are moisture, weathering, surface condition and cedar extractives that can bleed through paint. Proper cleaning, drying, preparation and primer selection are critical to getting a durable finish.
TL;DR
- Cedar can be painted, including cedar siding, trim, shutters and other exterior wood surfaces.
- Preparation matters more than simply applying paint. Dirt, mildew, loose coatings, weathered wood and excess moisture can all contribute to premature failure.
- Cedar can release water soluble extractives that cause brown, yellow or reddish discoloration through some coatings. An appropriate stain blocking primer can help prevent this.
- New cedar and weathered cedar require different preparation. Weathered wood may need more cleaning, sanding, scraping or other surface preparation before coating.
- Paint and stain serve different purposes. Paint provides an opaque finish and hides the wood grain, while stain can preserve more of cedar’s natural appearance.
- Moisture control is essential. Painting damp wood or coating cedar before it has adequately dried can lead to adhesion problems, blistering, peeling or other premature coating failure.
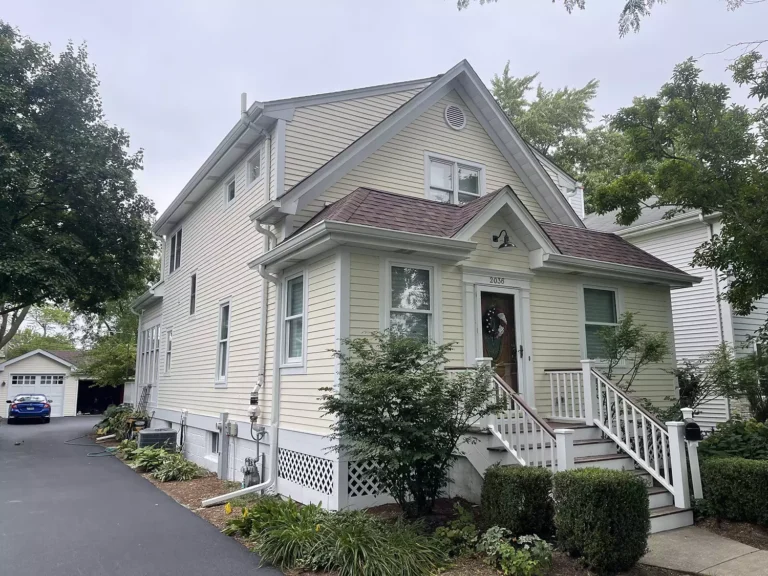
Cedar is a common exterior wood because it is relatively durable and naturally resistant to decay compared with many other types of wood. It is used for siding, trim, shingles, fences, decks, shutters and other exterior applications.
That does not mean cedar can simply be painted without preparation. Cedar contains natural extractives that can migrate toward the surface, particularly when moisture is involved. Some of these extractives are water soluble and can discolor certain coatings. Cedar also responds to prolonged exposure to sunlight and weather. Uncoated wood can become gray and develop a degraded surface over time.
The condition of the wood therefore matters just as much as the fact that it is cedar. A sound cedar surface with appropriate preparation can generally accept an exterior coating successfully. A heavily weathered surface with loose fibers, moisture problems, failing paint or biological growth requires more attention before a new coating is applied.
Why Cedar Can Be Painted
Paint adheres to properly prepared cedar in much the same general way it adheres to other exterior wood surfaces. The goal is to provide a clean, sound, sufficiently dry surface with the right primer and exterior topcoat. Painting cedar makes sense when a homeowner wants:
- An opaque color that covers the natural wood appearance.
- More flexibility in changing the exterior color.
- A consistent appearance across siding and trim.
- Coverage of weathered or previously painted wood.
- A finished surface that is maintained through future repainting.
The coating system needs to match the condition of the wood. A new cedar board, an older weathered siding surface and previously painted cedar should not automatically receive the same preparation process.
What to Consider Before Painting Cedar
Before deciding how to coat cedar, inspect the existing surface rather than focusing only on the color you want. Several conditions can change the appropriate approach.
New Cedar vs. Weathered Cedar
New cedar is usually in better physical condition, but it still needs proper preparation. Depending on how long it has been exposed and how it was stored or installed, it may have accumulated dust, dirt, surface contaminants or moisture.
Weathered cedar presents additional challenges. Sunlight breaks down the wood’s surface over time. Rain and humidity contribute to repeated wetting and drying. The surface may become gray, rough, fuzzy or degraded. Dirt and biological growth can accumulate, particularly in areas that remain damp or receive limited sunlight.
Before painting weathered cedar, check for:
- Gray or degraded wood fibers.
- Dirt and surface contamination.
- Mildew or other biological growth.
- Loose or peeling paint.
- Cracked or failing caulk.
- Damaged boards.
- Areas that remain unusually damp.
- Exposed end grain.
- Excessive surface roughness.
- Previous stains or coatings.
Weathered wood should not simply be covered with a fresh coat of paint in an attempt to hide these problems. Coating over a weak or contaminated surface can cause the new finish to fail along with the material underneath it.
Moisture deserves particular attention. If water is getting behind siding, entering through failed joints or being held against the wood, painting alone will not solve the underlying problem. The source of the moisture needs to be addressed first.
Paint or Stain?
Painting is not automatically better than staining cedar. The right choice depends on the appearance you want and the condition of the wood. Paint may be appropriate when you want:
- An opaque color.
- Strong visual coverage of the wood.
- A traditional painted siding appearance.
- The ability to change the exterior color.
- A uniform finish across different wood surfaces.
Stain may be preferable when you want:
- The natural cedar appearance to remain visible.
- Wood grain to show through.
- A finish specifically intended to penetrate or color the wood rather than form an opaque film.
- A more natural looking exterior.
The existing finish also matters. Cedar that has already been stained may require a different preparation and coating approach than bare wood. The type and condition of the old coating need to be evaluated before selecting a new finish.
There is no universal answer that says every cedar exterior should be painted or every cedar exterior should be stained.
Planning a Painting Project?
How to Prepare Cedar for Painting
Preparation is one of the most important parts of painting cedar. The coating cannot compensate for dirt, loose material, excessive moisture or a failing substrate. The exact preparation will depend on whether the cedar is new, bare and weathered, previously painted or previously stained.
1. Clean and Inspect the Surface
Start by removing surface contamination. Dirt, mildew, chalky residue, pollen and other contaminants can interfere with adhesion. Cleaning should be appropriate for the substrate and existing coating. Excessive pressure from power washing can damage soft wood fibers or force water into areas where it does not belong, so cleaning equipment needs to be used carefully.
If biological growth is present, it should be properly treated and removed rather than simply painted over. After cleaning, the cedar needs enough time to dry before coating. The required drying period depends on weather, temperature, humidity, wood condition and how much water was introduced during cleaning. A surface that feels dry on top is not necessarily dry throughout.
2. Address Damaged or Failing Areas
Loose paint should be removed rather than buried under another coat. Depending on the condition, preparation may involve scraping, sanding, feathering edges or removing other failing material. Sanding can help smooth rough areas and reduce abrupt transitions between intact and removed coatings.
Damaged wood should also be evaluated before painting. A cracked, deteriorated or structurally compromised board may need repair or replacement rather than another layer of coating.
Pay attention to joints and gaps as well. Exterior grade caulk can be useful at appropriate joints where movement and water intrusion are concerns, but not every gap should be filled indiscriminately. Wood siding needs to move and certain construction joints are intended to remain open for drainage or ventilation.
3. Prime the Cedar
Primer is especially important when painting bare cedar because of the wood’s natural extractives. A suitable primer can help provide a stable surface for the finish coat while reducing the likelihood of discoloration caused by extractive bleeding. The correct primer depends on the condition of the wood and the coating system being used.
This is one reason simply buying a general purpose primer is not always sufficient. When cedar has a history of tannin or extractive staining, a primer specifically intended to block those types of stains may be appropriate. The product’s technical documentation should be checked to confirm that it is suitable for exterior cedar and the intended topcoat.
Previously painted cedar may not require the same primer strategy everywhere. Sound existing coatings can behave differently from bare wood, while exposed areas where the old coating has been removed may require spot or full surface priming.
The primer also needs to be applied according to the manufacturer’s instructions. Film thickness, temperature, drying conditions and compatible topcoats can all affect performance.
Planning a Painting Project?
What Paint and Primer Should You Use on Cedar?
There is no single primer or paint that is correct for every cedar surface. The coating system should account for whether the cedar is bare, weathered, previously painted or previously stained, as well as the level of exposure to sun and moisture.
Why Cedar Bleeds Through Paint
One of the most frustrating problems with painted cedar is brown, yellow or reddish discoloration appearing through a new paint finish.
Cedar contains natural water soluble extractives. When moisture moves through the wood, these compounds can migrate toward the surface. If they reach a coating that does not adequately block them, staining can become visible through the finish.
This is commonly called tannin bleed, although the discoloration from cedar is more accurately associated with wood extractives rather than tannins alone. The problem can be especially noticeable when a light colored paint is applied. Several factors can contribute to extractive staining, including:
- Bare cedar.
- Moisture movement through the wood.
- Inadequate primer.
- Weather exposure.
- Certain existing coating conditions.
- Insufficient surface preparation.
Cleaning alone does not necessarily solve the problem. The goal is to prepare the surface properly and use a compatible stain blocking primer when the situation calls for one.
If staining continues after painting, simply adding more finish paint may not solve the underlying problem. The coating system may need to be reassessed.
Choosing an Exterior Paint
The topcoat should be a quality exterior paint intended for the application and compatible with the selected primer.
Exterior coatings need to tolerate repeated exposure to sunlight, rain, temperature changes and normal movement of the wood. For cedar siding, consider:
- Whether the product is intended for exterior wood.
- Compatibility with the primer.
- The existing coating, if any.
- Expected exposure to sun and weather.
- The condition of the cedar.
- Manufacturer application requirements.
- Recommended surface and weather conditions.
Paint should not be applied simply because the air temperature seems comfortable. Surface temperature, humidity, precipitation and other weather conditions can affect application and curing.
Follow the coating manufacturer’s instructions rather than relying on a generic drying or recoating schedule. For homeowners dealing with complicated cedar surfaces, Big League Painting can help evaluate whether the existing wood and coating are suitable for repainting and what preparation may be necessary.
Planning a Painting Project?
Common Cedar Painting Mistakes
Many cedar painting failures are caused by preparation or moisture problems rather than the paint itself.
1. Painting Dirty Cedar
Paint does not turn dirt into a suitable bonding surface. Contamination can interfere with adhesion and may become trapped beneath the new coating.
2. Painting Damp Wood
This is one of the more serious mistakes. Moisture trapped beneath a coating can contribute to poor adhesion and premature deterioration. Cedar should be allowed to dry adequately after rain or cleaning and obvious moisture problems should be corrected before painting.
3. Skipping Primer on Bare Cedar
Bare cedar can present extractive bleeding problems, especially beneath lighter colors. Applying finish paint directly to bare wood without considering primer requirements can increase the likelihood of discoloration.
4. Painting Over Peeling Paint
A fresh topcoat does not restore adhesion to a loose old coating. Failing areas should be removed and the remaining edges prepared properly.
5. Ignoring Weathered Wood
Severely weathered cedar can have a degraded surface that is unsuitable for direct coating. Simply washing it and painting immediately may leave weak fibers underneath the new finish.
6. Using the Wrong Primer
A primer suitable for one type of wood or interior application may not provide the stain blocking or exterior performance needed on cedar.
7. Applying Paint Under Poor Conditions
Temperature, humidity, direct sunlight, wind, rain and surface temperature can all affect application. The coating manufacturer’s requirements should determine whether conditions are suitable.
8. Treating Moisture as a Paint Problem
If water is entering behind siding or accumulating around a building component, repainting the visible surface does not fix the source.
This is particularly important around joints, roof intersections, windows, doors and areas where drainage may be restricted.
How Long Does Paint Last on Cedar?
There is no reliable universal number of years that applies to every painted cedar surface. The useful life of the coating depends on the quality and condition of the cedar, preparation, primer and paint selection, application, sun exposure, moisture, climate, color and ongoing maintenance.
A cedar wall that receives strong afternoon sun and frequent weather exposure may age differently from a protected wall under an overhang. Other factors include:
- How well the surface was prepared.
- Whether moisture problems were corrected.
- Whether bare cedar was properly primed.
- Quality and compatibility of the coating system.
- Exposure to ultraviolet light.
- Local weather conditions.
- Movement of the wood.
- How quickly small coating failures are addressed.
Rather than waiting for widespread peeling, homeowners should inspect painted cedar periodically. Early signs of trouble can include chalking, cracking, peeling, discoloration, exposed wood, failed caulk and areas where the coating is separating from the substrate.
Addressing smaller failures can reduce the amount of preparation required for the next painting cycle.
Planning a Painting Project?
Is Painting Cedar Better Than Staining It?
Painting cedar is not inherently better than staining it. Each finish changes the appearance and maintenance approach of the wood. Paint is generally the better fit when the goal is an opaque, consistent color. It can cover the natural appearance of the cedar and provide a traditional painted exterior.
Stain can make more sense when preserving the natural character and grain of the cedar is a priority. The specific stain product and existing finish still matter, and stained cedar requires maintenance as the finish weathers.
The condition of the wood should also influence the decision. If the cedar is severely weathered or already has an existing coating, preparation may determine which finish is practical.
The homeowner’s desired appearance, existing coating, wood condition, exposure and willingness to maintain the surface all belong in the decision.
When Should You Hire a Professional?
Painting a small, accessible cedar feature can be manageable for an experienced homeowner. Larger cedar siding projects are more complicated because preparation and coating have to be consistent across a substantial surface. Professional help may be worthwhile when:
- Cedar siding is heavily weathered.
- There is widespread peeling or coating failure.
- Extractive staining has occurred.
- The existing coating is unknown.
- Moisture problems are suspected.
- Multiple repairs are needed before painting.
- The home has difficult to reach areas.
- Large areas require scraping and sanding.
- You are unsure whether the surface should be painted or stained.
- A consistent exterior finish is important.
A professional evaluation can also help distinguish a paint failure from an underlying wood or moisture problem. That distinction matters because applying another coat over an unresolved problem can lead to another premature failure.
Big League Painting can assess the condition of cedar surfaces and help homeowners determine whether painting, additional preparation or another coating approach makes sense for the project.
Conclusion
So, can you paint cedar? Yes. Cedar can be successfully painted when the wood is sound, properly prepared, sufficiently dry and coated with products appropriate for the substrate and conditions.
The most important issues are not simply choosing a paint color. Cedar’s natural extractives can cause discoloration, weathered wood may need substantial preparation and moisture can undermine an otherwise good coating system.
Paint is a practical choice when you want an opaque exterior color and are prepared to maintain the painted surface. Stain may be more suitable when preserving the natural appearance of cedar is the priority.
Before painting, inspect the wood, identify moisture or coating problems, prepare the surface properly and select a primer and exterior paint based on the actual condition of the cedar. That approach gives the coating a much better chance of performing as intended.